
Table of Contents
- What Serve Pronation Actually Is (and Why It Adds Power)
- How to Pronate on Tennis Serve: The Continental Grip and Swing Path
- Tennis Serve Pronation Drills for Beginners
- Common Tennis Serve Mistakes That Block Pronation
- Troubleshooting a Stuck Wrist and Staying Injury-Free
- Equipment Feedback: Using Your Racket and Ball to Feel Pronation
- Frequently Asked Questions
Last Updated: September 13, 2026
What Serve Pronation Actually Is (and Why It Adds Power)
Serve pronation is the inward rotation of the forearm that turns the racket face through the ball at contact, and it is the single biggest source of free racket head speed on a tennis serve. Adult players often chase power with bigger backswings when the real fix sits in a movement most of them have never isolated. If you have been searching for tennis serve pronation exercises for beginners, start here: understand the motion before you train it.
ITF coaching guidance on serve technique
The reason pronation matters so much is timing. The forearm rotates late in the swing, right as the racket accelerates upward toward contact. That late rotation adds speed without adding effort, and it also lets the racket face arrive at the ball on the correct angle for topspin or slice.
The Forearm Rotation Behind the Snap
The “snap” you hear coaches describe is forearm rotation, not a wrist flick. Your forearm has two jobs at contact: extending the elbow and rotating the palm outward. Together, those two motions create the whip that good servers make look easy.
How to Pronate on Tennis Serve: The Continental Grip and Swing Path
You cannot pronate with a forehand grip. The continental grip is the foundation, because it places the racket edge-first into the swing and lets the forearm roll the face open through contact (usta.com). Switch to it now, even if your serve feels weaker for two weeks.
Here is the sequence, in order:
- Take the continental grip, index knuckle on bevel two.
- Toss slightly in front and to your right if you are right-handed.
- Drop the racket behind your back with a loose arm.
- Swing up and out toward the ball, leading with the edge of the racket.
- Let the forearm rotate so the palm finishes facing outward.
- Finish with the racket across your body, not straight ahead.
The last two steps are where pronation lives. If your racket finishes pointing at the net, you blocked the rotation.
Tennis Serve Pronation Drills for Beginners
The fastest way to learn pronation is to train it slowly, without a ball, until the motion feels automatic. These tennis serve pronation drills take ten minutes and need nothing but a racket and a wall. Order matters: do them in the sequence below, because each drill builds the feel the next one depends on.
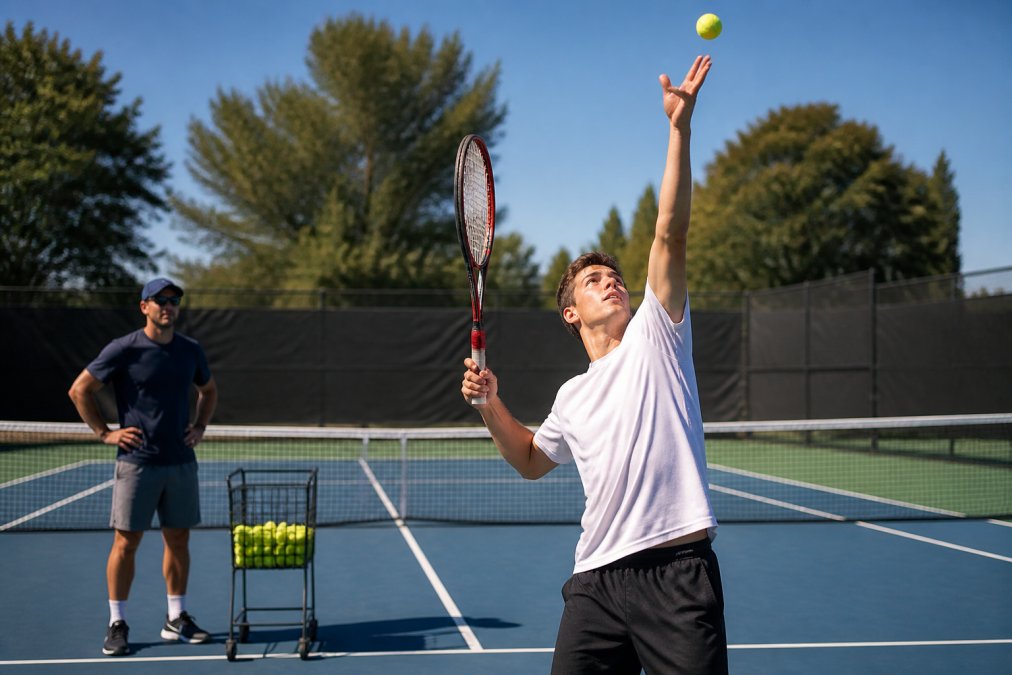
Stage 1: Wall Toss and Shadow Swings (No Ball)
Stand a racket-length from a wall and swing in slow motion, stopping at contact to check your racket face. The face should point slightly down and away, not flat at the wall. Do twenty repetitions per set, three sets. Speed comes later.
A common pattern among beginners is to swing too fast and lose the face angle. If you cannot stop cleanly at contact, slow down until you can. The stop is the drill, not the swing.
Stage 2: Toss and Catch Drill
Toss the ball with your serving arm and catch it with the same hand, palm up, just above your head. This trains the exact forearm rotation you need, and it gives you instant feedback: if your palm faces down, you flipped instead of rotated.
Do this for 30 reps. If your palm consistently faces down, you are flicking the wrist rather than rotating the forearm. Reset by holding the racket in continental grip and rotating the palm outward without moving the elbow.
Stage 3: Slow-Motion Serves with a Dead Ball
Use a flat, low-pressure ball (a dead practice ball works) and serve at roughly 50 percent speed. The dead ball gives you more time to feel the strings brushing across the surface rather than punching through it. Hit 20 serves, focusing only on the finish: palm turned outward, racket finishing low and across your body.
Stage 4: Full-Speed Serves with Feedback
Once the slow-motion finish is consistent, add speed in 10 percent increments. After every five serves, check one thing: did the racket finish across your body, or did it stop short? A short finish means the rotation stopped before contact.
| Drill | Time | Reps | What It Fixes |
|---|---|---|---|
| Wall shadow swings | 5 min | 60 | Swing path and face angle |
| Toss and catch | 3 min | 30 | Forearm rotation feel |
| Slow-motion serves (dead ball) | 5 min | 20 | Timing of the snap |
| Full-speed serves with finish check | 5 min | 15 | Transfer to real serving |
Fixing the “Pushing” Problem
Most beginners who cannot pronate are pushing the ball with a flat racket face instead of brushing up and across. Two cues fix this:
- Lead with the edge. At the start of the upswing, the racket’s edge should face the ball, not the strings. If the strings face the ball early, you will push.
- Finish across, not forward. If your racket finishes pointing at the net, the rotation was blocked. Aim for the racket to cross your body and end near your opposite hip.
Stop any drill if you feel sharp wrist or elbow pain. Pronation is a forearm rotation, not a wrist snap, if the wrist is doing the work, you are loading the joint incorrectly and risking strain. Warm up the shoulder with arm circles and light band work before any serving session.
Film one set of shadow swings from behind at slow motion on your phone. You do not need a coach to spot a blocked finish, the video shows it in two seconds.
Common Tennis Serve Mistakes That Block Pronation
The most common tennis serve mistakes all share one cause: tension. A tight grip kills forearm rotation before it starts, and most players grip at a seven out of ten when they should be at a three (PubMed).
Three errors to watch for:
- Serving with a forehand grip. The racket never gets on edge, so there is nothing to rotate.
- Flicking the wrist. The wrist barely moves in a correct serve. The forearm does the work.
- Finishing across the body too early. This usually means the arm decelerated before contact.
If your elbow or shoulder aches after serving, stop and check your grip before your next session. Serving with a forehand grip forces the arm to muscle the ball, and that load lands on the elbow.
Troubleshooting a Stuck Wrist and Staying Injury-Free
A stuck wrist almost always means the arm is too tense or the toss is too far behind you. Fix the toss first: it should land slightly in front of your lead foot, not over your head. When the toss drifts back, your body instinctively protects the shoulder and the rotation disappears.
Safety matters as much as technique, especially for players returning after time away. Warm up the shoulder with arm circles and band work before you serve, and cap your serving volume while you rebuild the motion. A short, deliberate practice block often beats a long, sloppy one.
Film your serve from behind at slow motion on your phone. You do not need a coach standing next to you to spot a blocked finish; the video shows it in two seconds.
Equipment Feedback: Using Your Racket and Ball to Feel Pronation
Your equipment can teach you pronation faster than any explanation. A softer, dead ball and a racket with a fresh, grippy overgrip give you more feel for the rotation, because you can sense the strings brushing across the ball rather than punching through it.
Try this: hit ten serves at half speed and listen. A correctly pronated serve makes a brushing sound, not a flat thud. That auditory cue is one of the quickest ways to build the motion, because it confirms the racket face is moving across the ball rather than into it.
The follow-through tells the rest of the story. A pronated serve ends with the palm turned outward and the racket finishing low and across your body. If your arm stops short, the rotation stopped short too.
Training Aids That Force Correct Pronation
Most guides stop at “use a dead ball.” Here are the specific tools that give beginners mechanical feedback:
- Weighted training balls (2-4 oz heavier than a standard ball). The extra mass slows the swing and exaggerates the forearm rotation, so you feel the snap instead of muscling through it. Hit 10-15 slow serves with a weighted ball, then switch back to a standard ball, the regular ball will feel light and fast.
- A racket with a smaller grip (size 1 or 2). A smaller grip lets the hand rotate more freely around the handle, which makes pronation easier to feel. If your grip is too large, the palm blocks rotation. Most adult beginners fit a size 2 or 3; if you are between sizes, size down for pronation drills.
- A fresh overgrip. A slick or worn grip forces you to squeeze harder, and tension kills rotation. Replace the overgrip every 8-10 sessions during pronation training.
- A foam or low-compression practice ball. These compress more on contact, which lengthens the brushing sensation and makes the forearm rotation audible and tactile.
Grip Pressure: The Hidden Variable
A tight grip kills forearm rotation before it starts. Most players grip at a seven out of ten when they should be at a three. Test yourself: hold the racket so loosely that a partner can pull it out of your hand with light pressure. That is your target grip pressure for pronation drills. Once the motion is grooved, you can add grip pressure for power, but not before.
Equipment does not replace technique, but it shortens the feedback loop. A weighted ball, a smaller grip, and a fresh overgrip will tell you within five serves whether you are rotating or pushing.
Frequently Asked Questions
How to improve tennis serve pronation?
Start with the continental grip and a loose wrist. Practice shadow swings where you feel the racket face turn inward after contact, then add toss-and-catch drills. Wall tosses help you feel the forearm rotation without chasing a perfect serve. Ten minutes of daily shadow work builds muscle memory faster than an hour of full-speed serving once a week. Film your swing from the side to check the racket face closes after contact.
What does pronation do in tennis serve?
Pronation rotates the forearm inward so the racket face closes through contact, which adds racket head speed and topspin without extra arm tension. It also protects the elbow by letting the larger forearm muscles handle the load instead of the smaller shoulder and wrist muscles. Players who pronate correctly get more pace and a higher bounce on the serve, and they reduce the risk of elbow and shoulder strain from muscling the ball.
How can beginners safely practice serve pronation?
Warm up the shoulder and forearm first with arm circles and light band work. Start with shadow swings and toss-and-catch drills at half speed before adding a ball. Keep the grip loose, limit full-speed serves to short sets of 10 to 15, and stop if you feel elbow or shoulder pain. Quality reps beat quantity.
What are the common mistakes when learning serve pronation?
The biggest mistakes are gripping the racket too tight, using an eastern forehand grip instead of continental, and trying to muscle the ball with the shoulder instead of letting the forearm rotate. Many beginners also toss the ball too far in front or too low, which forces a flat push instead of a pronating swing. Fixing the grip and loosening the hand solves most of these problems within a few practice sessions.