
Table of Contents
- Why Footwork Is the Foundation of Your Tennis Game
- What You’ll Need to Train at Home
- How to Practice Split Step at Home
- Tennis Agility Drills for Beginners
- Tennis Footwork Exercises No Equipment Required
- Common Footwork Mistakes and How to Fix Them
- Injury Prevention for Footwork Training
- Conclusion: Building a Consistent Home Footwork Routine
- Frequently Asked Questions
Last Updated: September 14, 2026
Why Footwork Is the Foundation of Your Tennis Game
Footwork is the physical skill that decides how often you arrive at the ball balanced, on time, and ready to swing. Most players lose more points to late arrival than to bad technique, and the fix does not require a court, a partner, or a coach standing beside you. This guide from Crunch Time Coaching covers how to improve tennis footwork at home with seven drills, a progressive weekly plan, and the mistakes that quietly undo months of practice.
The core problem is that tennis footwork is a chain of small movements, not one big one. The split step starts the chain, the first step accelerates it, and the recovery step resets it. Skip any link and the whole sequence collapses.
Here is the part most players miss: you can train that chain in a driveway, a garage, or a living room. Court coverage, balance, and reaction time respond to short, repeated, well-structured sessions. Below, we break down exactly which drills to run, how often, and what to fix when progress stalls.
What You’ll Need to Train at Home
The honest answer is that home footwork training fails more often from a bad setup than from missing gear. Before you buy anything, solve the space problem, because most players quit home drills not because they are hard but because the living room is too cluttered to move safely.
The non-negotiables:
- Athletic shoes with lateral support. Running shoes are built for forward motion and will let your ankle roll on a hard cut. Court shoes or cross-trainers are the right call.
- A clear rectangle roughly 2 by 3 meters (about the footprint of a parked car) (the CDC). This is enough for a split step, a two-step lateral shuffle, and a recovery step.
- A non-slip surface. Concrete, hardwood, and low-pile carpet all work. High-pile carpet and polished tile do not.
- A timer. Phone timers work, but a cheap interval timer keeps your hands free and your eyes off the screen.
Worth adding once you are consistent:
- Cones, chalk, or painter’s tape for marking targets. Tape is the cheapest option and peels off hardwood without residue.
- An agility ladder. Useful, but a chalk line or a row of tape strips does 80 percent of the same job.
- A resistance band for hip and ankle work. A light band covers monster walks, lateral band walks, and ankle eversion drills.
- A partner or a wall. Both give you a ball to react to, which is the one thing solo drills cannot fully replicate.
The space problem, solved. If your only clear floor is a hallway, you can still train. Swap lateral shuffles for short forward-and-back steps, replace the figure-8 with a two-cone zigzag, and do your split step reps in place. The movement pattern matters more than the distance covered. A 2-meter hallway is enough for split step timing, shadow swings, and single-leg balance work.
The surface problem, solved. Hardwood and concrete are fast and unforgiving, which mimics a hard court. If you want to train the slower, sliding feel of a clay court, a low-pile rug or a rubber mat under your feet changes the friction enough to force different deceleration mechanics. Do not train on a slick surface in socks; the risk of a fall outweighs any benefit.
Set up your space once and leave it set up. Players who have to move furniture before every session skip sessions. A taped rectangle in a garage or basement that stays put removes the single biggest excuse.
You do not need a ball machine, a rebounder, or a full court. You need a safe rectangle, the right shoes, and a timer. Everything past that is a nice-to-have.
How to Practice Split Step at Home
The split step is a small hop that lands as your opponent contacts the ball, loading your legs so you can push off in any direction. Practice it at home by hopping off both feet, landing wide with knees bent, and holding that loaded position for a beat before moving.
A common mistake is timing the hop to your own rhythm instead of the opponent’s contact. Without a partner, use a wall or a ball machine, or simply bounce a ball and split as it hits the floor. The landing matters more than the hop: land on the balls of your feet, hips low, weight balanced between both legs.
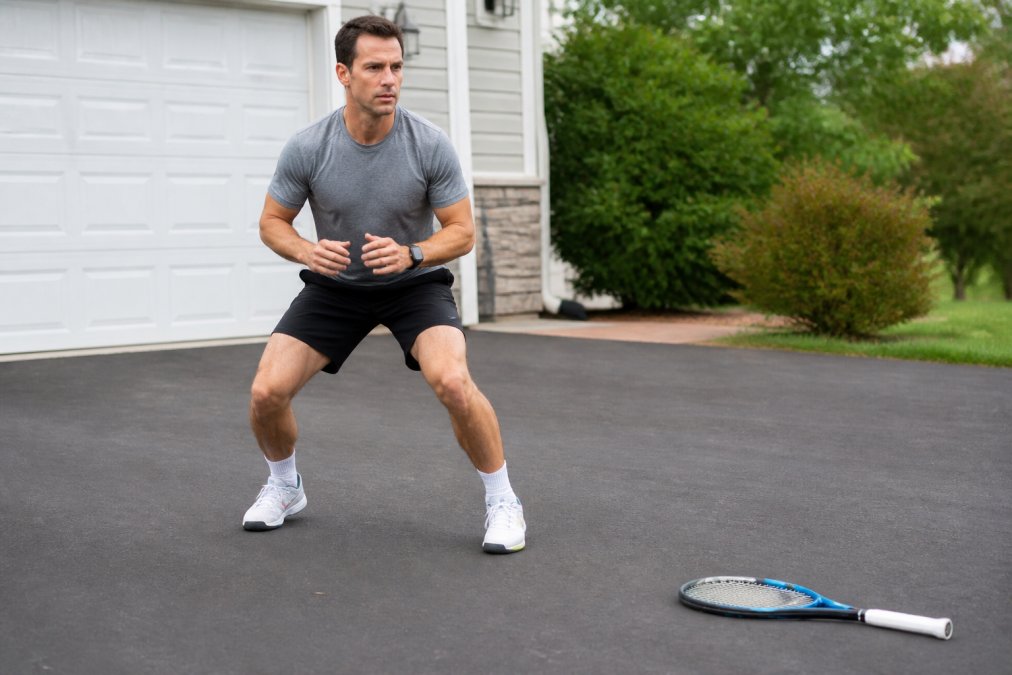
Mastering this explosive transition provides a foundational advantage when improving racket sport skills, especially as you explore tactical variations like third shot alternatives for padel players.
Film your split step from the side with your phone. Most players land flat-footed without realizing it, and the video makes the correction obvious within one session.
Do three sets of ten reps, resting thirty seconds between sets (CURRENT CONCEPTS OF PLYOMETRIC EXERCISE). Keep the landing quiet. If you can hear your feet slap the ground, you are landing too heavily.
Tennis Agility Drills for Beginners
Beginners should prioritize change of direction and balance over raw speed. The mistake almost every home trainee makes is chasing fast feet before the movement pattern is clean. Sloppy reps at full speed build sloppy habits that show up in matches.
Here is a four-week progression that layers one new skill per week. Run each session three to four times per week, and keep sessions to 15 to 20 minutes (health.gov). Short and frequent beats long and occasional.
Week 1: Lateral shuffle. Stay low, push off the outside foot, and keep your feet from crossing. Do 3 sets of 20 seconds with 30 seconds rest. The cue is “push, don’t step.” If your feet click together, you are stepping instead of pushing.
Week 2: Add forward and backward short steps. Same low stance, same push-off mechanic, but now you are moving in a straight line. Do 3 sets of 20 seconds. The cue is “stay under your hips.” If you stand up between steps, you have lost the load.
Week 3: Add the figure-8 around two markers. Place two cones or tape marks about 2 meters apart. Move in a figure-8 pattern, staying low through the turns. Do 3 sets of 30 seconds. The cue is “turn with your hips, not your shoulders.” Beginners who turn with their upper body lose their balance and slow down.
Week 4: Add the crossover step. This is the drill that separates beginners from intermediates. On a long reach, the trailing foot crosses in front or behind to cover ground faster than a shuffle can. Do 3 sets of 15 seconds per side. The cue is “cross only on the long ball.” Crossing on every step wastes energy and tangles your feet.
What to fix when it goes wrong:
- Feet clicking together. You are stepping, not pushing. Slow down and drive off the outside edge of the foot.
- Standing up between reps. Your center of gravity has risen. Reset your stance before the next rep.
- Turning with the shoulders. Your hips should lead the turn. Drop your shoulder and let the hips follow.
- Rushing the drill. Speed is the last thing to add, not the first. Clean reps at 70 percent speed beat sloppy reps at 100 percent.
Skipping the warm-up before agility work is the fastest route to a pulled calf or tweaked ankle. Five minutes of dynamic movement, not static stretching, prepares the tissue for lateral load. Leg swings, walking lunges, and ankle circles cover it.
The goal is smooth, controlled movement with a low center of gravity. Once the pattern is clean, add speed. Not before.
Tennis Footwork Exercises No Equipment Required
You can build real foot speed with nothing but your body weight and a floor. These tennis footwork exercises no equipment required are the backbone of any home routine.
| Exercise | Duration | Frequency | Primary Benefit |
|---|---|---|---|
| Split step reps | 3 x 10 | Daily | Loading phase timing |
| Lateral shuffle | 3 x 20 sec | 4x per week | Court coverage |
| Figure-8 run | 3 x 30 sec | 3x per week | Change of direction |
| Shadow groundstrokes | 3 x 10 | Daily | Foot placement and weight transfer |
| Crossover step | 3 x 15 sec | 3x per week | First step quickness |
Shadow groundstrokes deserve special attention. Move to an imaginary ball, plant, swing, and recover to center. This trains the full sequence: approach, foot placement, weight transfer, and recovery step. Do it slowly enough that every position is correct.
Common Footwork Mistakes and How to Fix Them
The biggest footwork mistake is standing upright between shots. A tall stance kills your first step because you have to drop before you can push. Stay low, knees bent, weight forward.
Three errors worth fixing this week:
- Crossing your feet on lateral movement. Fix: drill the shuffle until the crossover only happens on long reaches.
- No recovery step. Fix: after every shadow swing, take one deliberate step back toward center.
- Landing flat-footed on the split step. Fix: practice landing on the balls of your feet and holding for a beat.
What most guides miss is that these errors are usually conditioning problems, not knowledge problems. You know what to do; your legs get tired and revert to old habits. Short, frequent sessions fix that faster than long, occasional ones.
Injury Prevention for Footwork Training
Footwork training loads the ankles, knees, and hips repeatedly, so injury prevention belongs in the plan from day one, not after something hurts. Older players returning to the game need this most.
Build these into every session:
- A five-minute dynamic warm-up: leg swings, lunges, ankle circles
- Progressive volume: add one set per week, not five
- Single-leg balance work for ankle stability
- Hip and calf strengthening twice a week
- One full rest day between hard sessions
Balance and proprioception training matter more as you age. Standing on one leg while tossing a ball, or doing slow single-leg reaches, trains the stabilizers that protect the ankle during a hard change of direction. If you are coming back after years away, start with half the volume you think you can handle.
Conclusion: Building a Consistent Home Footwork Routine
Consistency beats intensity in footwork training, and the players who improve fastest are the ones who show up for short sessions several times a week rather than one long grind on the weekend.
If you want a structured path instead of assembling drills yourself, Crunch Time Coaching offers step-by-step daily lessons, a challenge-based curriculum, and in-person training camps where a coach can see your footwork live and correct it on the spot. That live feedback is the piece home drills cannot replace.
Get started with Crunch Time Coaching and sharpen the footwork that turns close matches into wins. Reserve Your Spot Today.
Frequently Asked Questions
How can I improve my footwork for tennis without a court?
You can improve tennis footwork at home using bodyweight drills that mimic court movement. Focus on the split step, lateral shuffles, crossover steps, and figure-8 patterns. These exercises build the same muscle memory and coordination you need on court. Practice 15 to 20 minutes, three to four times per week. Even a small space like a driveway or garage works if you adjust the distance of your movements.
What are the best agility drills for tennis players at home?
The best home agility drills include lateral shuffles, split steps, crossover step patterns, and short sprints to a target. These movements train acceleration, deceleration, and change of direction, which are key for court coverage. Aim for 3 sets of 30 to 45 seconds per drill. Rest 30 seconds between sets. You can do all of these with no equipment, using cones or household objects as markers.
How long should I practice footwork drills to see results?
Most players notice better balance and quicker first-step reactions within two to three weeks of consistent practice. Aim for 15 to 20 minutes of footwork training three to four times per week. Progress by increasing speed or adding complexity, not just duration. Consistency matters more than long sessions. Pair your home drills with on-court play to transfer the improvements to match situations.
What is the importance of the split step in tennis footwork?
The split step is a small hop that lands as your opponent hits the ball. It loads your legs and puts you in a balanced, ready position. From there you can push off in any direction. Without a split step, you lose reaction time and your first step is slower. Practicing this at home with a shadow swing or wall hit trains the timing so it becomes automatic during matches.