
Table of Contents
- Why the Kick Serve Grip Change Decides Your Second Serve
- The Continental Grip Tennis Serve: Your Starting Point
- Step 1: Build the Grip Change Into Your Service Motion
- Step 2: Set Your Tennis Kick Serve Toss Location
- Step 3: Contact, Pronation, and Follow-Through
- Tennis Serve Grip Transition Exercises You Can Do Daily
- Troubleshooting Grip Pressure and Common Kick Serve Mistakes
- Conclusion
- Frequently Asked Questions
Last Updated: September 16, 2026
Why the Kick Serve Grip Change Decides Your Second Serve
Most players never fix their second serve because they never change their grip. They swing with the same forehand grip they use for their first serve, then wonder why the ball sits up to be attacked. The step by step tennis serve grip change for kick serve is the single adjustment that separates a reliable second serve from a liability.
The Continental Grip Tennis Serve: Your Starting Point
The continental grip tennis serve is the foundation for every advanced serve, including the kick. Your index knuckle rests on bevel two, your heel pad on bevel one, and the racquet is held like a hammer rather than a frying pan.
Finding the Continental Grip by Feel
Pick up your racquet and shake hands with the handle. That’s the continental grip: your palm faces the side of the racquet, not the strings. If your palm faces forward at contact, you’re still in a forehand grip and the kick serve will never happen. Don’t grip tightly while searching for the bevels, let the racquet rest in your fingers, find bevel two with your index knuckle, then close your hand.
How It Differs From the Forehand Grip
The forehand grip, often called eastern or semi-western, places the palm behind the handle. It’s built for flat and topspin forehands, not serves: the racquet face opens at contact and the ball goes flat or slices. The continental grip keeps the racquet face angle closed through the strike, producing the upward brushing motion a kick serve needs.
If you’re coming from a forehand grip, expect your first two weeks of serving to feel weak and awkward. That’s normal. The ball will fly long or into the net until your wrist adjusts to the new racquet face angle. Fight the urge to switch back.
Step 1: Build the Grip Change Into Your Service Motion
The grip change shouldn’t be a separate action you think about. It happens during the take-back, before your arm accelerates: as you bring the racquet up into the trophy position, your non-dominant hand rotates the racquet slightly in your dominant hand.
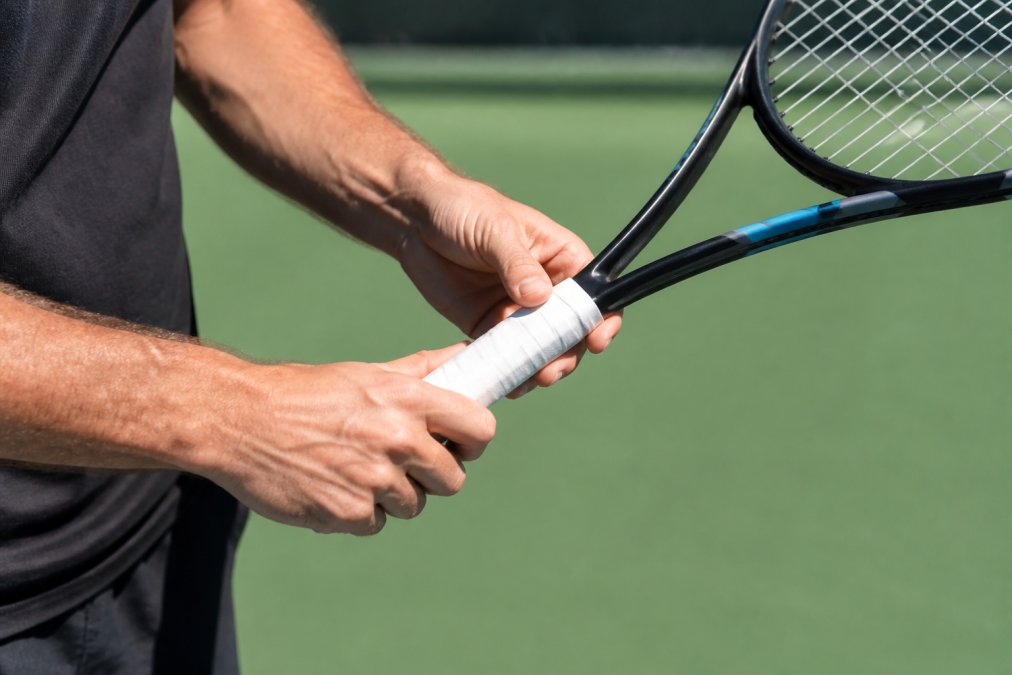
Grip Transition Mechanics During the Service Motion
Most guides assume you set the grip before the motion starts and never touch it again. That works for advanced players who already live in a continental grip. For everyone else, the grip change happens inside the motion, and the timing window is narrow. If you start in an eastern forehand grip, your index knuckle is on bevel three; the goal is bevel two, a single-bevel rotation of roughly 45 degrees.
Why the Timing Window Is So Narrow
The trophy position is a loading position: forearm supinated, elbow bent, shoulder externally rotated. Finish the grip change too early and your forearm rotates back toward neutral, killing the supinated load that feeds the pronation snap. Finish too late and you arrive mid-rotation with the racquet face somewhere between forehand and continental, which is why so many intermediate kick serves sail long or dump into the net.
Film yourself from behind at the trophy position. The racquet face angle is visible in a single frame, and it will tell you instantly whether your grip change finished on time. Most players are shocked at what the frame shows.
ITF coaching resources on serve mechanics
Step 2: Set Your Tennis Kick Serve Toss Location
The tennis kick serve toss location is not above your head or out in front like a flat serve. It’s slightly behind your head and to the left if you’re right-handed, closer to your back shoulder than your front.
Toss Height and Depth for a Consistent Strike Zone
Toss so the ball peaks just behind your head and drops into a strike zone above your back shoulder. Depth varies with height and flexibility, but the principle holds: contact the ball slightly above your head as it moves downward, not at its peak. Tossing too far forward makes your body drive through the ball and flattens the serve, pull the toss back a few inches and you’ll feel it immediately.
Tossing too far forward forces your swing path to flatten. The result is a serve that looks like a kick but bounces at waist height, giving your opponent an easy attack. Move the toss back before you change anything else.
Step 3: Contact, Pronation, and Follow-Through
Contact happens at the top of your reach, slightly behind your head, with the racquet face angled to brush up and across the back of the ball. Pronation, the forearm rotation that turns your palm outward after contact, generates the kick. Your swing path travels low to high, brushing the ball at roughly seven o’clock. Don’t muscle the ball over the net; accelerate through the brushing zone and let the spin work.
Tennis Serve Grip Transition Exercises You Can Do Daily
These tennis serve grip transition exercises build grip-change muscle memory without a court. Five minutes a day is enough.
- Shadow grip rotations – Hold your racquet in a forehand grip, then rotate to continental and back, 20 times per hand. Focus on smooth rotation, not speed.
- Toss-and-catch with grip change – Toss a ball with your non-dominant hand while rotating your racquet hand into continental. Catch the ball. Repeat 15 times.
- Wall brushing drill – Stand a foot from a wall and brush the racquet up the wall with a continental grip, feeling the pronation at the top. 10 reps.
- Trophy position holds – Move into the trophy position with a continental grip and hold for five seconds. Check your racquet face angle in a mirror.
- Slow-motion serves – Serve at 30% speed, exaggerating the grip transition and brushing motion. 10 serves.
| Exercise | Duration | Frequency | Primary Benefit |
|---|---|---|---|
| Shadow grip rotations | 2 min | Daily | Grip muscle memory |
| Toss-and-catch | 3 min | Daily | Toss and grip coordination |
| Wall brushing | 2 min | 3x weekly | Pronation feel |
| Trophy holds | 2 min | Daily | Racquet face awareness |
| Slow-motion serves | 5 min | 3x weekly | Full motion integration |
Troubleshooting Grip Pressure and Common Kick Serve Mistakes
Grip pressure is the most overlooked variable in the kick serve. Most players grip tight from the moment they pick up the racquet, locking the wrist and killing the brushing motion. Start light, roughly three out of ten, and tighten only at contact, so the wrist stays loose through the loading phase and can snap through the impact zone.
The Pressure Gradient Through the Motion
Grip pressure should change through the serve, and that change is what produces the whip.
- Address and take-back: 2 to 3 out of 10. The racquet should feel like it’s resting in your fingers, not held in your palm. If you can’t feel the bevels, you’re too tight.
- Trophy position: 3 to 4 out of 10. You need just enough pressure to keep the racquet from flopping, but the forearm should still be able to rotate freely.
- Acceleration into contact: 5 to 6 out of 10. The hand closes slightly as the arm accelerates, but the squeeze is a result of the swing, not a cause of it.
- Contact: 7 to 8 out of 10 for a fraction of a second. This is the only moment the grip should feel firm.
- Follow-through: back to 3 out of 10. If your hand stays clenched after contact, you decelerated early.
The Wrist-Snap Failure Modes
When grip pressure is wrong, the wrist snap fails in one of three recognizable ways:
- The push. The wrist never snaps; the arm pushes the racquet through contact. The ball goes flat and long. Cause: grip too tight at the trophy position.
- The flop. The wrist is so loose that the racquet face is unpredictable at contact. The ball sprays left or right with no consistent spin. Cause: grip too loose through acceleration.
- The stall. The wrist starts to snap but the forearm can’t rotate far enough to complete the pronation. The ball comes off with weak topspin and sits up. Cause: forearm rotation limitation (see below).
Self-Testing Forearm Rotation Range
Before blaming technique, test whether your forearm can reach the position a kick serve requires. Bend your dominant elbow 90 degrees, forearm parallel to the ground, palm up, then rotate your palm down as far as it goes without moving the elbow. A kick serve needs roughly 80 to 90 degrees of pronation.
If you feel pain on the inside of your elbow during the pronation phase, stop and get it assessed. Medial elbow pain in servers is often a grip-pressure problem, not a strength problem, and pushing through it makes it worse.
Other Common Kick Serve Mistakes
- Tossing too far forward. The single most common cause of a kick serve that doesn’t kick.
- Chasing spin instead of racquet head speed. Slow swings produce slow spin. The kick comes from brushing fast, not hard.
- Contacting the ball at its peak. The strike zone is slightly past the peak, as the ball descends. Contacting at the peak flattens the trajectory.
- Finishing on the same side of the body. The racquet should cross to the opposite hip; a same-side finish means you decelerated before contact.
The kick serve grip change is a rotational movement, not a squeeze. Loose grip through the load, firm only at contact, and pronation at the top are the three things that matter most. If your forearm can’t rotate far enough, fix the range of motion before you fix the technique.
USTA player development resources
Conclusion
The kick serve grip change is the hardest technical adjustment in tennis because it touches every part of your motion, from toss to follow-through. Most players give up after two weeks because the serve feels worse before it feels better. Push through and you’ll have a second serve that holds up under pressure.
Frequently Asked Questions
What grip should you use for a kick serve?
Use a continental grip, sometimes shifted slightly toward an eastern backhand for extra topspin. The continental grip lets you brush up the back of the ball instead of hitting flat through it, which produces the upward swing path a kick serve needs. If you currently serve with an eastern forehand grip, the switch will feel awkward for a few weeks, but it is the foundation for a reliable second serve.
How can I practice changing my grip during the service motion?
Set up with your forehand grip, then rotate your hand to the continental grip as you begin your toss. Do this slowly, without hitting a ball, 20 to 30 times in a row. Once the rotation feels automatic, add a toss and catch the ball instead of serving it. The goal is to make the grip transition part of your loading phase, not a separate step you think about.
What are common mistakes when adjusting the grip for a kick serve?
The most frequent errors are gripping too tightly, which kills racquet head speed, and changing the grip too late in the motion, after the trophy position. Other mistakes include tossing the ball too far forward, which forces you to hit flat, and trying to snap the wrist instead of letting pronation happen naturally. Loosen your grip pressure to about a 4 out of 10 and let the toss location do the work.
How long does it take to see results from a kick serve grip change?
Most players need two to four weeks of daily practice before the new grip feels natural, and six to eight weeks before the kick serve holds up in match play. Older players or anyone returning after a long layoff may need longer, since grip changes depend on forearm rotation and wrist mobility. Short, frequent sessions beat long weekend practices for building this habit.
Your second serve is either a weapon or a target, and the difference comes down to whether you’ve committed to the grip change. Crunch Time Coaching offers step-by-step daily lessons, a challenge-based curriculum, and hands-on in-person training sessions designed to transform your serve in one week. Get started with Crunch Time Coaching and turn your second serve into a point you actually want to hit. Reserve Your Spot Today.