
Table of Contents
- Why Serve Drills Matter for Beginners
- Tennis Serve Toss Drills: Building a Consistent Foundation
- Tennis Serve Drills at Home: No Court Required
- Tennis Serve Consistency Drills: Repetition and Rhythm
- Beginner Tennis Serve Practice: A Structured Weekly Plan
- How to Use This Plan
- Warm-Up Before Every Session (5-8 Minutes)
- Block 1 (Weeks 1-2): Toss and Stance Only
- Block 2 (Weeks 3-4): Racket Arm, Trophy Position, Pronation
- Block 3 (Weeks 5-6): Service Line Serves
- Block 4 (Weeks 7-8): Baseline Serves and First/Second Serve Split
- Weekly Schedule at a Glance
- Log Every Session
- Common Beginner Serve Errors and How to Fix Them
- Measuring Progress: Serve Percentage and Double Fault Reduction
- Next Steps: From Drills to Match Play
- Frequently Asked Questions
Last Updated: October 9, 2026
Why Serve Drills Matter for Beginners
A weak serve kills your game before the rally starts. The best tennis serve drills for beginners isolate each component of the serve motion, build consistency, and create a foundation you can trust under pressure.
Players who master their serve through structured drills advance faster and win more matches.
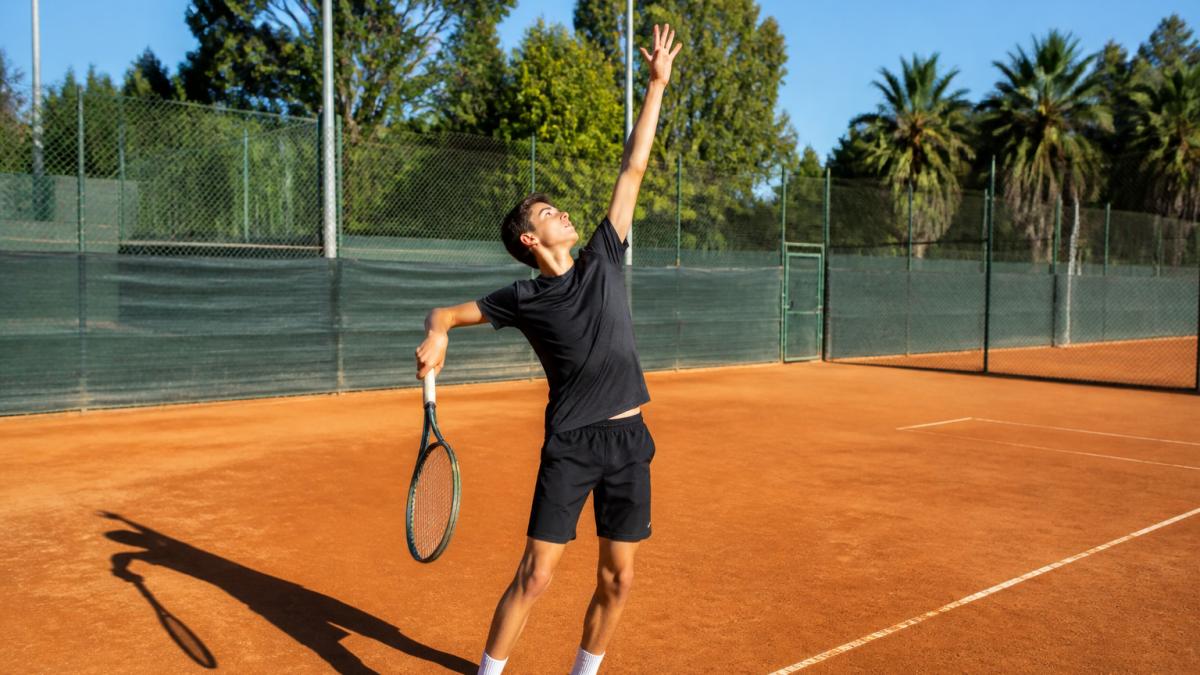
Tennis Serve Toss Drills: Building a Consistent Foundation
Your toss is everything. A bad toss forces compensations throughout the motion, creating inconsistency and limiting power, so serve drills for beginners must start here.
The Hand-Behind-Back Toss Drill
This drill isolates the toss entirely. Stand feet shoulder-width apart, hands behind your back. Release the ball from your tossing hand and let it drop into your other hand.
Toss consistency means the ball lands about 12-18 inches in front of your baseline foot and 6-12 inches right of your centerline (for right-handers).
The Target Box Toss Accuracy Drill
Place a towel or chalk mark where you want your toss to land. Toss 10 balls and count how many land on or near it. Repeat 3 times per session.
Tennis Serve Drills at Home: No Court Required
You don’t need a court to improve your serve. Many of the best tennis serve drills at home focus on motion and positioning rather than hitting balls over the net.
Shadow Swing and Throwing Motion Drill
Stand in your serve stance without a ball or racket. Execute the full serve motion slowly, focusing on each phase: feet positioning, knee bend, shoulder rotation, racket drop, and follow-through.
The serve is fundamentally a throwing motion: elbow up, wrist lag, pronation at contact. Isolating it builds neural pathways.
Wall Serve Drill for Racket Drop and Follow-Through
Stand about 15 feet from a wall or fence. Toss the ball and perform your full serve motion, aiming to hit the wall. Focus on your racket drop into the trophy position and follow-through.
This combines toss, motion, and ball contact, with the wall giving timing feedback, court-like conditions without a net.
Tennis Serve Consistency Drills: Repetition and Rhythm
Consistency comes from repetition and rhythm. These drills make your serve reliable under match conditions.
Service Line Serving for Accuracy and Control
Stand behind the service line (not the baseline) and serve into the service box. The shorter distance removes baseline pressure while forcing accuracy and control.
This emphasizes placement over power, many beginners try to hit hard before they can hit accurately. Service line serving flips that priority and transfers to baseline serves.
Target-Hit Rate Tracking Drill
Divide the service box into left, center, and right zones. Serve 10 balls at each zone and track how many land in. Record results daily.
Watching your target-hit rate improve week to week builds confidence, and placement is what you’ll need in matches.
Beginner Tennis Serve Practice: A Structured Weekly Plan
Random practice doesn’t work. What follows is a sequenced beginner path with concrete repetition counts, rest intervals, success thresholds, and a clear rule for when to move on.
How to Use This Plan
- Practice 4 days per week, 25-35 minutes per session. Two days can be at home with no court.
- Rest at least one full day between serving sessions; the shoulder and elbow need recovery.
- Every session: 5-8 minutes warm-up, 15-20 minutes drills, 3-5 minutes cool-down and logging.
Warm-Up Before Every Session (5-8 Minutes)
Never serve cold:
- 2 minutes of light jogging or jumping jacks.
- 10 arm circles each direction, 10 band or towel pull-aparts.
- 10 slow shadow swings at half speed, no ball.
- 10 easy tosses with no racket to wake up the tossing arm.
Stop and rest if you feel sharp shoulder or elbow pain, not soreness. Soreness fades with warm-up; sharp pain does not. New players are the most likely group to overload the shoulder because the serve is the most violent motion in the sport.
Block 1 (Weeks 1-2): Toss and Stance Only
No full serves, no racket contact, a bad toss forces every later compensation.
- Hand-behind-back toss drill: 3 sets of 10, 30 seconds rest. Target: 8 of 10 land in the same 12-inch zone.
- Target box toss drill: 3 sets of 10, 30 seconds rest. Target: 7 of 10 land within one ball-width of the mark.
- Shadow swings, no ball: 2 sets of 10 slow, 2 sets of 10 normal speed. Focus on stance width and knee bend.
Exit criteria: Two consecutive sessions where your toss lands in the target zone at least 80% of the time. If you’re not there after two weeks, stay in Block 1.
Block 2 (Weeks 3-4): Racket Arm, Trophy Position, Pronation
Add the racket but keep the ball out for the first half of each session.
- Shadow swings with racket: 3 sets of 10, focusing on racket drop into the trophy position and follow-through.
- Pronation drill (slow motion, no ball): 3 sets of 10. Start palm facing away, rotate to palm-down at the imaginary contact point, the forearm rotation that produces spin and pace.
- Wall serve drill: 3 sets of 10 into a wall or fence from about 15 feet. 45-60 seconds rest.
Exit criteria: 20 consecutive shadow swings where the racket reaches the trophy position without your elbow dropping below shoulder height, and 15 of 20 wall serves making clean contact with the wall above a waist-high line.
Block 3 (Weeks 5-6): Service Line Serves
Now you serve real balls from the service line, not the baseline, shorter distance, more accuracy.
- Service line serves: 4 sets of 10, 60 seconds rest. Count serves in.
- Target zone serves: 3 sets of 10, alternating left, center, right zones. 60 seconds rest.
Exit criteria: 7 of 10 serves landing in the service box across two consecutive sessions, and at least 5 of 10 landing in the called target zone.
Block 4 (Weeks 7-8): Baseline Serves and First/Second Serve Split
Move to the baseline and add the tactical layer: an aggressive first serve and a trustworthy second serve.
- Baseline first serves: 3 sets of 10, 60-90 seconds rest. Aim for pace and placement.
- Baseline second serves: 3 sets of 10, 60-90 seconds rest. Aim for a higher, safer arc with spin.
- Full-point simulation: 10 serves played out against a partner or wall, where drills meet match reality.
Exit criteria: 65% or better first-serve percentage in a practice set, and no more than one double fault per service game.
Weekly Schedule at a Glance
| Day | Focus | Location |
|---|---|---|
| Monday | Block drills | Court or wall |
| Tuesday | Rest | , |
| Wednesday | Block drills | Court or wall |
| Thursday | Rest | , |
| Friday | Block drills | Court or wall |
| Saturday | Block drills + point play | Court |
| Sunday | Rest | , |
Progress is gated, not timed. You move to the next block when you hit the exit criteria, not when the calendar says so. A beginner who spends four weeks on the toss then breezes through the rest will end up with a more reliable serve than one who rushes to full serves in week two.
Log Every Session
Keep a one-line entry: date, block, drill, reps attempted, reps successful, how the shoulder and elbow felt. Two minutes per session tells you whether a block is working and whether you’re ready to advance.
Common Beginner Serve Errors and How to Fix Them
These mistakes appear in almost every beginner. Each error below is paired with its cause, a self-check, and the drill that fixes it, so you can diagnose yourself without a coach.
Error 1: Erratic Toss Placement
What it looks like: The toss varies by 12 inches or more, so you reach, lunge, or shorten your motion to compensate.
Self-check: Toss 10 balls with no racket or serve motion and mark where each lands.
Fix: Return to the hand-behind-back toss drill for one week: straight arm, fingertips release, no wrist flick.
Error 2: Insufficient Leg Drive and Knee Bend
What it looks like: Your legs stay nearly straight, so power comes from the arm alone, capping speed and loading the shoulder.
Self-check: Film one serve from the side and pause at the trophy position.
Fix: Shadow swings with exaggerated knee bend, 3 sets of 10.
Error 3: Rushing the Serve Motion
Cause: Trying to hit hard before the motion is grooved.
Self-check: Count out loud: “toss, trophy, contact.” If the beats blur together, you’re rushing.
Fix: Shadow swings at half speed, 3 sets of 10, focusing on the gap between toss and racket drop.
Error 4: Elbow Dropping Below Shoulder in the Trophy Position
Cause: Weak shoulder external rotation, or modeling the motion on a baseball throw without realizing the serve keeps the elbow higher.
Self-check: In a mirror at the trophy position, your hitting elbow should be at or above shoulder height, racket head up and slightly back.
Error 5: No Pronation at Contact
Cause: The unfamiliar forearm rotation makes the body default to pushing instead of throwing.
Self-check: Serve one ball and freeze at contact. Palm facing forward rather than down means you’re not pronating.
Fix: Pronation drill, 3 sets of 10 slow-motion with no ball: palm away, rotate to palm-down at the imaginary contact point.
Error 6: Gripping the Racket Too Tightly
What it looks like: Forearm fatigue early in a session and a serve that feels mushy at contact.
Cause: Beginners equate grip pressure with control, but a tight grip locks the wrist and kills the whip that generates racket-head speed.
Self-check: Grip pressure at address should be about a 3 out of 10.
Fix: Continental grip check before every session.
Pick one error per week to work on. Trying to fix all six at once guarantees you fix none. Each self-check takes under a minute and tells you whether the fix is working.
When to Stop and Rest
Stop if you feel sharp shoulder or elbow pain, if your toss placement degrades by more than a few inches, or if your serve percentage drops sharply from fatigue. Two days off is cheaper than two months off.
Measuring Progress: Serve Percentage and Double Fault Reduction
Two metrics matter most: serve percentage and double faults.
Serve percentage is serves landing in the box divided by total attempts.
Double faults cost you points directly. Track them in practice and matches, and aim to cut them by 50% within 8 weeks.
Log date, serves attempted, serves in, and double faults, that data shows whether your drills are working.
Next Steps: From Drills to Match Play
Once your serve is consistent in practice, test it in matches: first serves landing at least 70% of the time and double faults rare.
Crunch Time Coaching specializes in transforming serves through structured drills and personalized feedback.
The serve is your foundation. Get it right, and everything else becomes easier.
Frequently Asked Questions
How many serves should a beginner practice in one session?
Start with 50-75 serves per session, 3-4 times per week. Beginners benefit more from consistent, focused repetition than high volume. Quality matters more than quantity at this stage. Focus on toss consistency and body rotation before increasing serve count. As your technique improves, gradually increase to 100-150 serves per session. Track how many successful serves you land in the service box to monitor your serve percentage.
Can you practice a tennis serve at home without a court?
Yes. Shadow swings, throwing motion drills, and wall serves build serve fundamentals without court access. Practice your toss against a wall, work on racket drop and pronation indoors, and refine your leg drive and body rotation in any open space. These drills develop muscle memory and timing. Once you move to a court, you’ll have solid mechanics in place. At-home practice fills gaps between court sessions and accelerates skill development.
What is the easiest tennis serve for a beginner to learn first?
The flat serve is the most straightforward to learn because it requires the simplest mechanics: toss, racket drop, and contact at the peak of your reach. Start with flat serves from the service line to build confidence and toss consistency. Once you master the basic motion and can land 60% of serves in the box, add slice and kick serves. Flat serves teach you body rotation, leg drive, and pronation without the added complexity of spin generation.
How can beginners improve their tennis toss consistency?
Isolate toss practice: toss 20-30 times per session without hitting, aiming for the same spot each time. Use the hand-behind-back drill to focus solely on release and placement. Practice in front of a mirror or wall to see your release point. Your toss should land about 12-18 inches in front of the baseline and slightly to the right (for right-handers). Consistent toss placement is the foundation of serve accuracy and speed. Spend 10 minutes on toss drills before every practice session.
Your serve has been costing you matches. The drills in this guide isolate each component, build consistency, and create measurable progress. Crunch Time Coaching takes this further with personalized instruction, video feedback on your technique, and structured challenge-based curriculum designed to accelerate your improvement. Reserve your spot today and transform your serve in one week.