Overview
Having a powerful serve is a huge advantage when you step on the court to play a match. I’m sure you have seen matches on TV where someone dominates the opponent all day with blistering aces and easy second ball put aways.
Over my 30 plus years of playing and coaching I have noticed that many people playing club level tennis really struggle to put the necessary components together to have a reliable powerful serve.
This e-book will give you the foundation to start developing what I like to refer to as easy power. Easy power is the ability to generate lots of power into a shot but after you hit the shot you feel as if it took very little effort.
If that sounds good to you let’s get started….
Contents
Step 1: Where Power Begin and Ends…The Kinetic Chain
Step 2: Use the Core an under-utilized power source
Step 3: How to Effectively use the Trophy Pose to Your Full Advantage
Step 4: Use the Lag Effect to Develop the Ticking Time Bomb Serve
Step 5: Replace the Pizza Move with the Selfie
Step 6: Dangle to Sprinkler…Edge to Pronation
Step 7: How to Develop Easy Toss Timing
Step 1: Where does power begin and End?
 Most people get this wrong right off the bat. They think about crushing a serve with their arm. The results are serves that lack maximum power potential, take a lot of energy, and lead to injury.
I’m not saying you don’t get power by swinging hard or fast because you do. However, you are certainly not maximizing your potential for power and you definitely not creating effortless power.
If you want to max out on power and have it feel effortless you should concentrate on your legs first. I’m talking all the way down to the balls of your feet and pinky toes.
Max power in almost all sports, tennis, boxing, shooting a basketball, or hitting a baseball comes from the ground up.
I’m talking about the kinetic chain and you may or may not have heard of it. Here is the formal definition.
Dr. Arthur Steindler adapted this theory in 1955, and included an analysis of human movement.The concept of the kinetic chain originated in 1875, when a mechanical engineer named Franz Reuleaux proposed that if a series of overlapping segments were connected via pin joints, these interlocking joints would create a system that would allow the movement of one joint to affect the movement of another joint within the kinetic link. Dr. Arthur Steindler adapted this theory in 1955, and included an analysis of human movement. Steindler suggested that the extremities be viewed as a series of rigid, overlapping segments and defined the kinetic chain as a “combination of several successively arranged joints constituting a complex motor unit.” The movements that occur within these segments present as two primary types—open and closed.
OPEN-CHAIN MOVEMENT
Steindler defined open kinetic chain is defined as a combination of successively arranged joints in which the terminal segment can move freely. In an open-chain movement, the distal aspect of the extremity, or the end of the chain farthest from the body, moves freely and is not fixed to an object.
Now that’s complicated and really to have a great serve we don’t need to think that hard.
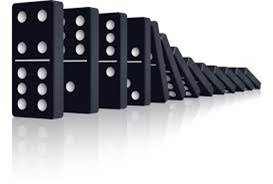 Just think of your body as a domino puzzle and when one part of the body starts to move it triggers another part of the body into motion.
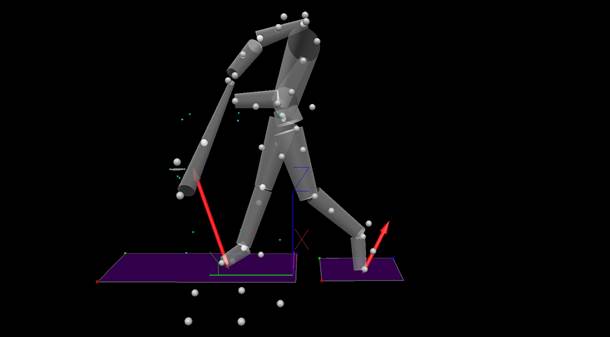
On the serve the power will work its way up the body from the feet to the calves, then hamstrings and quads, hips, torso, chest, shoulders, tri-cep, forehand, wrist, hand.
So when you serve, I first want you to pay close to the weight on your feet.
Here you have three options:
Weight on front foot like Fed
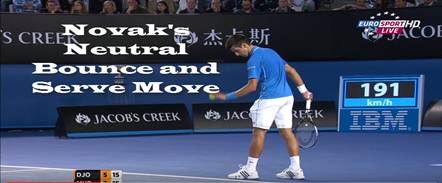
Weight more even like Djokovic
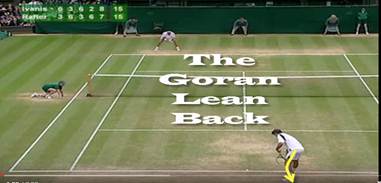
Or weight on the back foot and leg like Goran Ivanisevic
All are fine but the key is you must go back to front to start to initiate power upward. As you go back a major check-point is you want to store power into the back Glute.
Once you have loaded the back glute completely you are ready to start shifting weight upward and forward into the trophy pose.
Step 2: Use the Core an Under-utilized Power Source
However, before you launch up into trophy position it is essential that you have loaded the core. This is down by a shoulder turn to the side as you lean back to load up the glute.
You know you are doing this correctly if you can show about 75% of your back to you opponent, just before and during the trophy pose.
Step 3: How to Effectively Use the Trophy Pose to Your Full Advantage
Now we reach one of the most critical parts of the serve where so many people begin to mess up so pay close attention. The “trophy pose” first you do want to feel like there is a definite pause without actually having one.
This feeling of a pause is key because this is where you want your legs to be spring loaded into its full bend so you can shoot up.
Note: This does not necessarily mean you have to jump into the serve but you do want to bend your legs as much as your body will comfortably allow.
Another key component of the trophy pose is to straighten out the arm and push the front hip out towards the baseline.
This brief pause is when the roles of energy start to change in the body and start to shift up the body, taking the load out of the legs, the torso started to rotate and unravel into the serve, working energy up through the chest, shoulders, arms, and hand.
Step 4: Use the Lag Effect to Create the Ticking Time Bomb Serve
The key to a perfect trophy pose though is not to actually fully pause but rather give the illusion of a pause by what I like to refer to as a “lagging effect”. If you completely pause all your momentum will be lost and it is like you have to start the kinetic chain all over again.
But now all that great work you have down from the legs, torso, etc is now lost.
So instead you want the hitting arm to lag slightly behind to beat of the tossing arm.
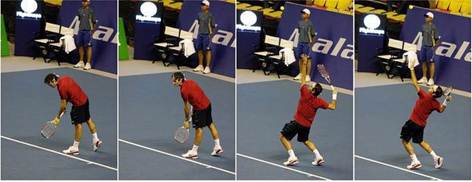
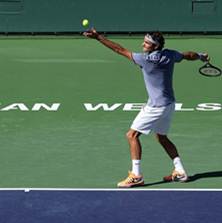 Notice how Federer’s dominate racket tip is still down by his pocket even though the ball toss is already released out of the hand.
This is what I call the Ticking Time Bomb. Because now Federer is forced to play a game of catch up at the end to strike the ball at its optimal height.
This produces enormous racket head speed that happens naturally and effortlessly once this lag effect timing is perfected.

Step 5: Replace the Pizza Move with the Selfie
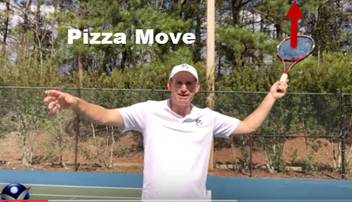 Once you cross over the lag effect and move up to what most people see as the trophy pose you have another major hurdle to cross and that is not get yourself into what I like to call “the pizza move”.
The pizza move is when you racket face point upward rather falling into the racket drop.
 I like to remedy this with “The Selfie” move where the racket is moving across the back of your head facing in instead of up.
Imagine if you were to turn around at this point of the serve that you could take a picture of yourself…aka a Selfie.
Step 6: Dangle to Sprinkler … Edge to Pronation
Another pitfall is still ahead to be careful. The scratch your back or racket drop. Just like I advised on the trophy pose, we DON’T want to pause or stop here. It will kill your serve and is commonly referred as to having a hitch in your serve.
Instead this is where we are building up our biggest momentum in our shoulder rotation and arms. We want to create a continuous looping feel.
I refer to this and dangle and sprinkler. Your racket butt cap start to shoot to the sky because you are so relaxed in the hand and then moves out of dangle like a sprinkler shooting across the yard.
See images below.
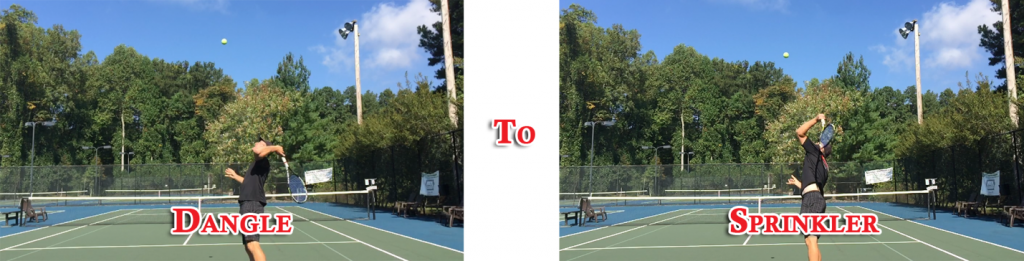
Ok we are almost home free but not out of the woods. Now as we are leading out of dangle, into sprinkler, and up to the ball. Our racket head needs to be on edge if you have the proper continental grip.
It is almost like a game of chicken because the racket is on edge until it is about a racket length away from the ball.
To change the angle of the racket head this is when you have to start throwing the away from the target toward the opposite net post of your targeted service box.
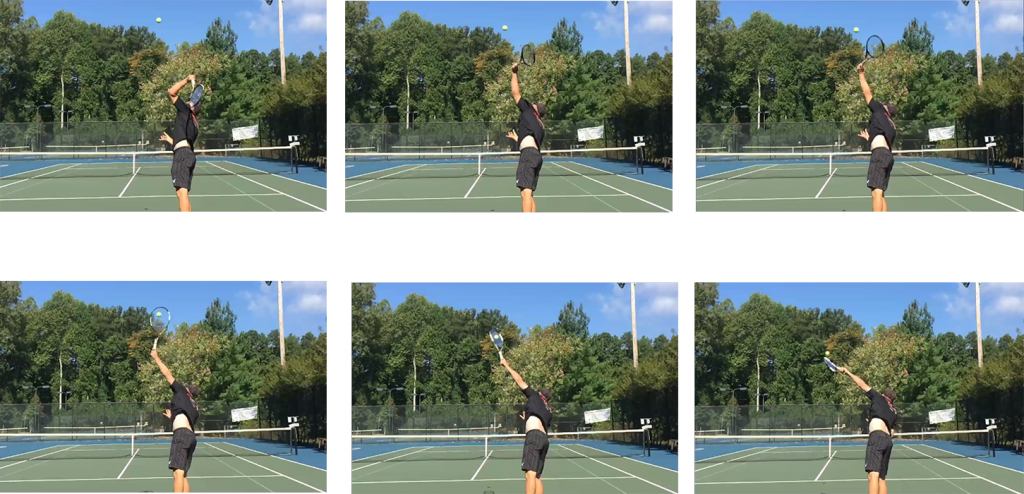
This is commonly referred to as pronation, and the degree to which your racket face pronates depends of whether you desire a flat, kick, or slice serve.
Not covering that today, maybe save that for another e-book or you can check out a special offer on my serve and forehand courses.
Step 7: How to Develop Easy Toss Timing

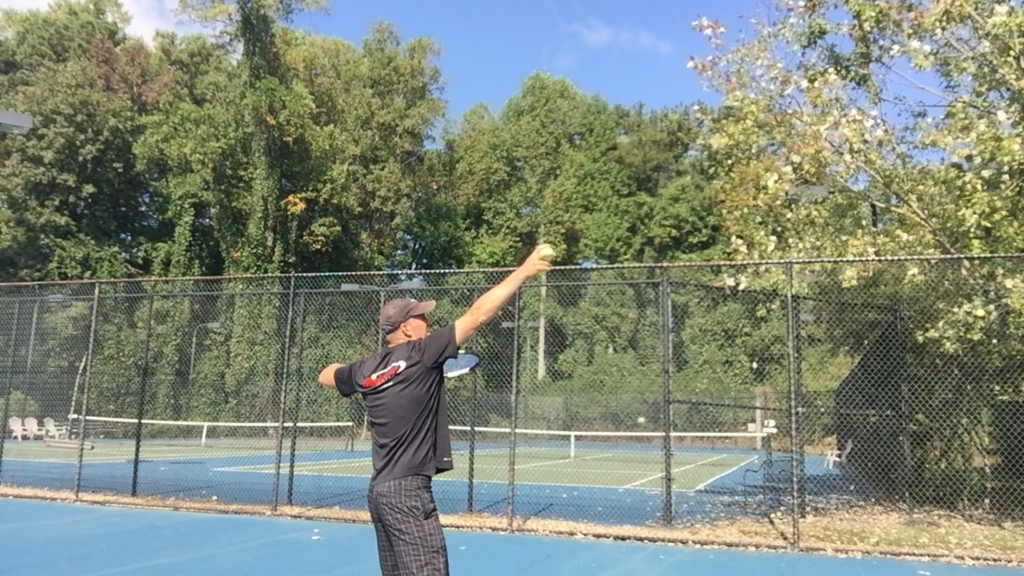
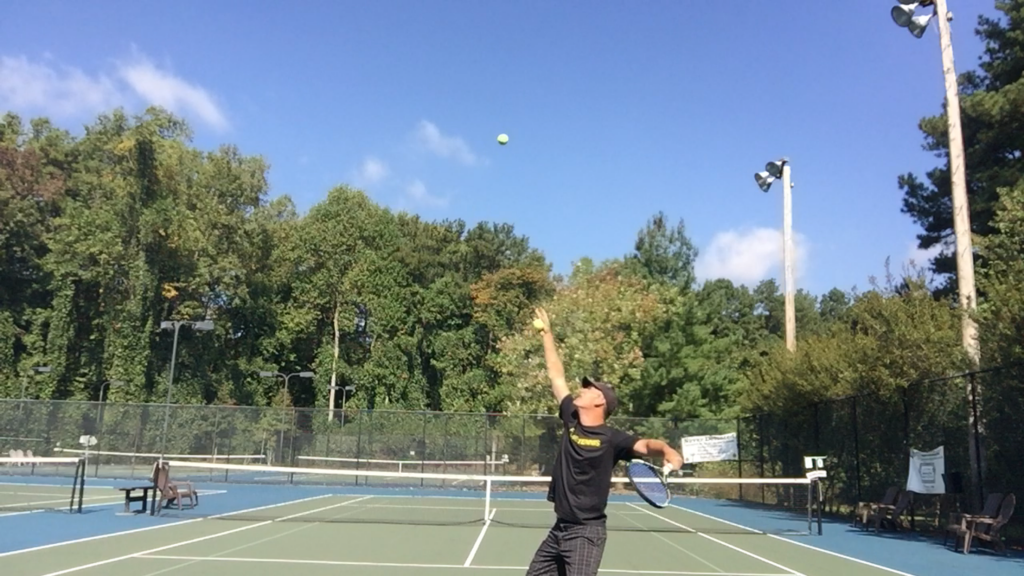
Finally, the moment of truth, striking the ball. In order to strike the ball cleanly with power time after time, I believe your toss has to be simple and consistent. If you are a right hander it should be placed anywhere from 12 to 1 so you can comfortably release in a natural throwing motion. (lefties 12-11)
Even more important the toss has to be high enough to where you can fully extend your body and get taller as you hit not smaller.
 However, the timing should be drop dead simple. You don’t want to toss the ball too high past the ideal contact point because then it will be too hard to time.
 Think about it. Would you rather catch a ball falling from the roof of your house or the empire state building. Unless you love impossible challenges you pick your house all day long because the ball is not dropping as fast and also mother nature has less of a chance to impact the flight of the ball.
So even though there have been great servers like Lendl with a high ball toss I prefer the ball 3 to 6 inches above my maximum reach of my racket.
This way timing is simple. My easy cue is when the ball appears to stop in the air it is full steam ahead.
So that is the secret to maxing out on power.
Summary Points:
- Power Comes from the ground up triggering the kinetic chain
- Load the back booty and leg fully before transitioning up and forward
- Load the core
- Don’t stop in the trophy pose or back scratch position
- Keep racket on edge just before contact
- Throw racket head towards opposite net post of target service box
- Easy toss for simple repeatable max timing
Best of luck and if you would like to see many of these tips in video form as well as 50 additional power tips explained on video Click Here to Start Additional Free Training.